How to select the right distance sensor?
In many applications, the accuracy of the sensor plays a major role. Often the accuracy is derived from the resolution in the datasheet. This is dangerous as the resolution is only one aspect of the total accuracy. There are a total of five criteria to consider. Let us first define the important factors in each measurement system.

Resolution
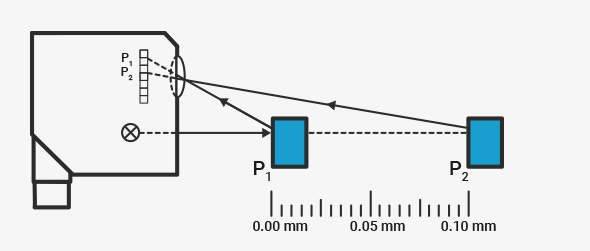
Resolution is the smallest change in the measurement for which the sensor will give a change in the output value.
Repeatability
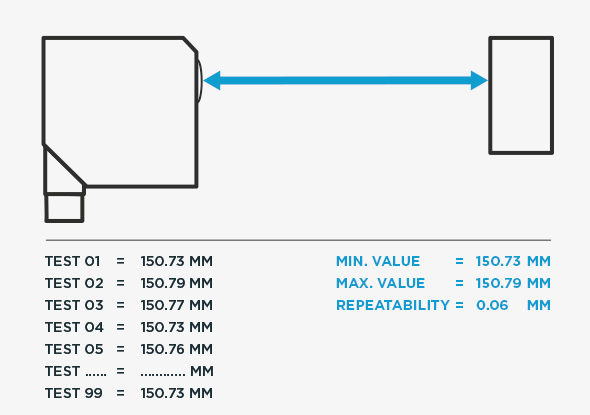
Repeatability is the variation in measurement that the sensor will give when tested at the same physical position with the same object. In an application, repeatability is equivalent to 'noise'.


Linearity value
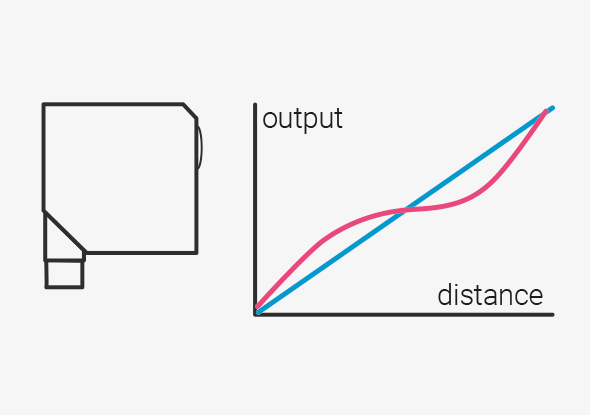
In the perfect world, all measured values along the range from minimum to maximum should give a straight line graph, but in reality this is not the case. The linearity value refers to the largest deviation between perfect and real results.
Test criteria
The fourth factor that is often overlooked is the test criteria used to generate these values. This is referred to as the value 'sigma'. Some manufacturers use one sigma (1σ) values in their data sheets, some three sigma (3σ) and a few give six sigma (6σ) results. However, these sigma values are very important for the accuracy of the sensor.
One sigma, three sigma, six sigma
One sigma gives a value that is correct in only 68.3% of the measurements, so it is not a meaningful value regardless of the resolution or linearity of the sensor.
Three sigma gives a value that is correct in 99.73% of the measurements, i.e. in 10,000 measurements 27 are wrong. Butmodern production systems produce millions of components. With the three sigma values, 2700 out of 1 million values can be wrong.
A six sigma sensor improves accuracy to 3.4 errors per million measurements. This is also the norm in many industries.
It is therefore crucial when selecting sensors for measurement applications that the specifications are carefully compared.
Temperature
Finally, we must take into account the temperature and its change. A change in temperature causes a variation in size in materials. Depending on the expansion coefficient of the material, the change will be different. For high-quality sensors, therefore, only materials with a very low temperature drift are used, such as special metals or glass instead of plastics. In addition, there are active measures to suppress the measurement inaccuracy (drift), for example with intelligent construction or temperature compensation via software.
Usually the temperature drift is given as %/K, e.g. 0.08%/K. This means that a sensor with a detection range up to 1000 mm would have a deviation of 0.8 mm per 1K temperature change. For precision applications, this is of course too much. Therefore, the new generation of sensors hasto 0.01%/K significantly improved.